

With cameras becoming more sophisticated by the day, it’s easier than ever to capture the world around us. And, by using a few editing tricks, you can make your images even more incredible!
This beginner’s guide to editing photos in Lightroom will show you how to take your pictures to the next level, without making your head explode.
So, step out of the darkroom and into Lightroom instead!
Why Do Your Photo Editing In Lightroom?
When it comes to photo management and manipulation, Lightroom is the industry standard. As part of the Adobe Creative Cloud Photography Plan, Lightroom doesn’t just stop at editing tools. It also utilizes smart organization to help you find your photos, as well as worry-free Cloud storage for backups.
With so many features, it’s easy to see why Lightroom is so popular!
But the primary reason for editing photos in Lightroom is its plethora of options, which help transform an image from meh to amazing. And because Lightroom’s edits are non-destructive, you can always go back to your originally imported image if you want to adjust any changes.
Expert Tip:
Shoot in RAW so you have more control over image editing. When shooting in JPEG, image information is compressed (and consequently lost). With RAW, the camera captures a scene using individual pixels rather than an image processed within the camera. Because of this, you can edit photos at the pixel level.
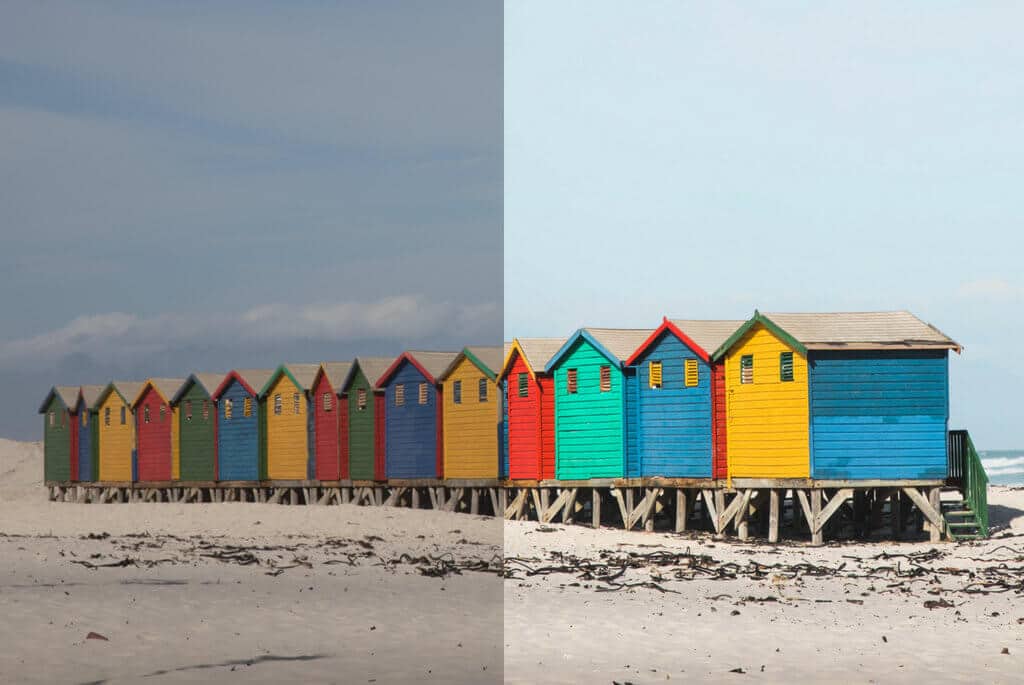
Before and after of a RAW image edited in Lightroom.
Lightroom’s Develop Dashboard
Behold, Lightroom’s Develop dashboard! Once your photos have been uploaded to the Lightroom Library, you can choose which ones you’d like to edit under the Develop tab.
Now, I know what you’re thinking – “Man, that’s a lot of bells and whistles!” And yes, you’re right. But, don’t worry! You’ll understand all of Lightroom’s basics by the time you’re done reading this post.
Get. Excited.
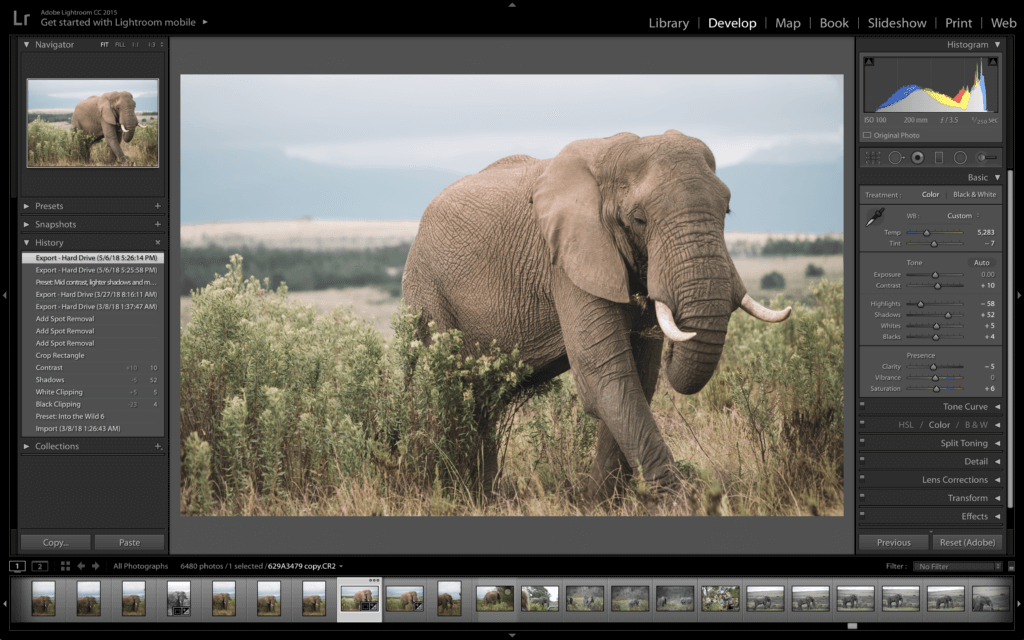
Lightroom’s Develop dashboard.
To The Left, To The Left
The two main areas you’re going to use on the left side of the Develop dashboard are Presets and History.
First, lets talk about Presets. These are templates of various combined slider edits that are pre-set (get it!?) to a certain position. Think of them as a jumping-off point to expedite your editing process. You can create these yourself, or purchase them from other photographers. Two that I really love are The Blonde Abroad presets, and Di Fruscia Photography presets (bonus – 40 trees are planted for every Di Fruscia preset purchase!)

Next, lets move on to the History section. You may notice Lightroom doesn’t have an “Undo” option. This is because each individual edit is saved under the History section, so you can easily return to any previous edit or to the image’s original imported state.
Expert Tip:
To quickly get rid of your most recent edit, hit “Command Z” to undo it.
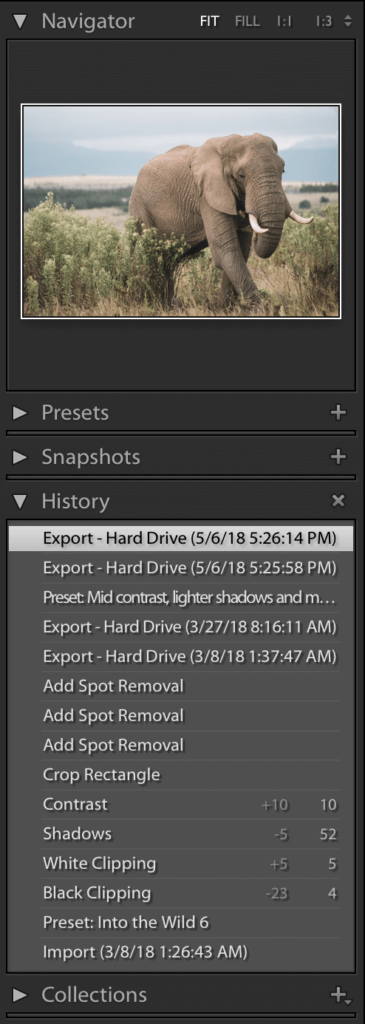
The left side of the Develop dashboard.
To The Right, To The Right
Now on to the right side of the Develop dashboard. This is where 99% of your editing photos in Lightroom magic will happen.
All the various options can be daunting, so let’s break down which tabs you’ll use most. That includes the top icon bar, the Basic tab, and the HSL/Color/B&W tab. Of course, the other tabs have lots of goodies as well! But to avoid overwhelm and confusion, I’ll just stick with these three for now.
So running down the right side, let’s take it from the top!
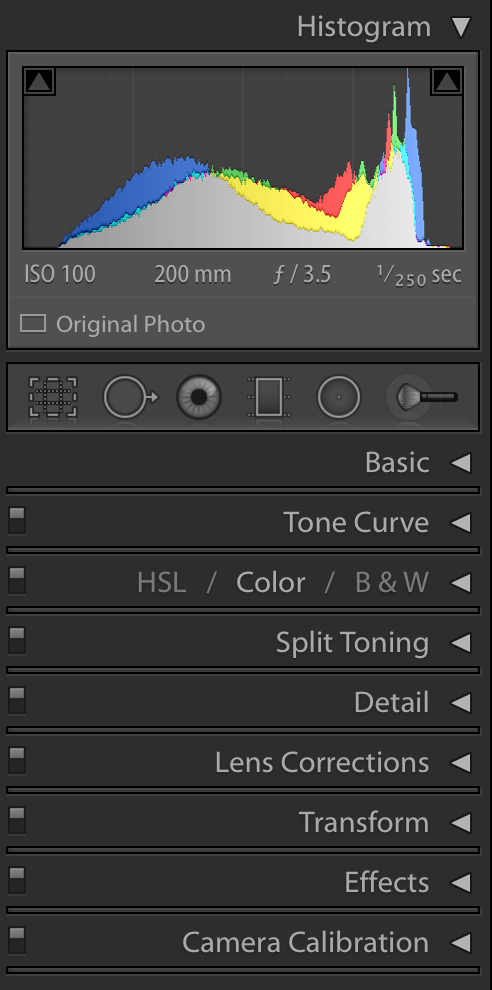
The right side of the Develop dashboard.
The icons under the Histogram are a gold mine for image improvement! These edits include Cropping (1), Spot Removal (2), Red Eye Correction (3), a Graduated Filter (4), a Radial Filter (5), and a Brush (6).

Icons on the right side of the Develop dashboard.
When choosing any of these tools, its corresponding options will appear underneath the icon bar. So let’s dig in to what they each do! We’ll get to the Cropping tool in a minute. In the meantime, let’s talk a bit about the others.
Spot Removal (2)
When using Spot Removal, you can either Clone the area or Heal it. Cloning is handy for landscapes, while Healing is best for portraits. You’ll also want to adjust the edge feathering so it isn’t obvious the area has been tweaked.
Red-Eye Correction (3)
The Red Eye Correction tool has two different options: Red Eye and Pet Eye. This helps to ensure that your subject’s eyes still appear natural after the edit, and not cartoonish.
Graduated Filter (4)
This tool is handy when you want to adjust aspects of the photo in a large, rectangular or square area (such as the sky). The effects within this tool are very similar to the slidebar adjustments in the Basic tab below (we’ll cover that shortly).
Radial Filter (5)
Similar to the Graduated Filter, this tool allows you to adjust aspects of a photo in a specific circular area. One trick you can use this for is to create an almost heavenly glow of warm sunlight shining down. Achieve this effect by increasing the exposure and warmth within the radial filter.
Brush (6)
The brush tool can be used to edit a very specific area within a photo. Whether you want to smooth out some wrinkles or enhance a subject, this tool has you covered!
Expert Tips:
When using a tool, double click on “Effect” at the top of the tool menu to return the sliders back to neutral. In addition, if you want to draw a straight line using the brush tool, simply hold down the “Shift” key.
Cropping (1)
Now back to Cropping. There are a couple of different things you can do using this tool (making it a great second step after your Presets!)
First and foremost, you can crop the image in either freeform (by clicking to “unlock” the yellow padlock) or a set ratio (by clicking to “lock” the yellow padlock). The set cropping ratios range from the original image dimensions to 2×3, 4×3, 5×7, 8×10, etc.
Another handy trick in the Cropping tool is leveling a photo. This is great if your horizon isn’t quite straight and you don’t want to mess with trying to eyeball it using the Rotate tool in the Transform tab. Simply click on the level to the left of “Angle” in the Cropping menu, and then click two points on the horizon in your photo (a line will appear in-between). The photo will level out accordingly. Finally, click “Constrain to Image” to crop out the resulting white space.
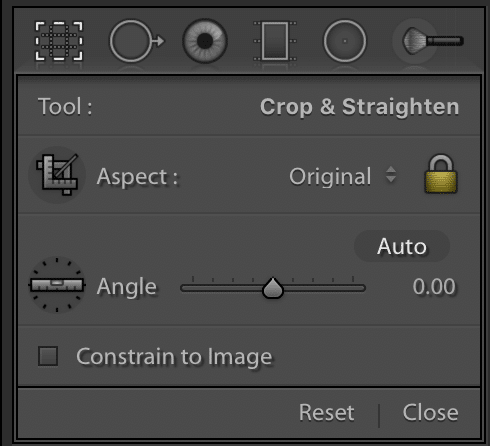
The cropping tool options.
Moving on! Below the tool icons you’ll find the first tab for Basic edits. This is where the bulk of your tweaks will happen using handy slidebars for adjustments.
The Temp and Tint options allow you to adjust an image’s color as a whole. For example, sometimes an image will appear yellowish (like a vintage photo). Don’t worry! Simply slide the Temp marker towards the blue, and you’ll see your picture transformed into a more natural hue.
Exposure will lighten your entire photo (avoid using this if possible. It’s better to adjust that using other slidebars below). And Contrast will make elements of the photo stand out more dramatically.
Highlights and Shadows control just that – highlights and shadows. This is one of the tools that’s better than simply increasing the Exposure, which can wash out the picture and mute details. Another tool along those same lines is Whites and Blacks. These slidebars will bring out the whites and blacks in the photo (making the photo brighter or darker accordingly).
Finally, you have Clarity, Vibrance, and Saturation. It’s best to use them sparingly! The quickest way to look like an amateur is going overboard with these tools, making your photo look fake. I typically don’t move the dial up on these more than a few points. Just enough to bring back colors and sharpness that may have been lost in translation.
Expert Tip:
If the photo has people, be very conservative with the Clarity. Dialing it up too much will make skin appear rough and uneven (not a flattering look on anyone!)

Sliders under the Basic tab in Lightroom’s Develop dashboard.
The other tool on the right side that’s really useful is Lightroom’s HSL/Color/B&W tab. Here, you can change the Hue, Saturation, and Luminance of specific colors within a photo. This is great if you want to dial back specific colors that appear oversaturated, or make someone’s skin tone look more natural, or you’d like to make certain hues really pop.
You can have a lot of fun tweaking each individual color (and this tool gives you greater control over your image!)

The HSL/Color/B&W tab in Lightroom’s Develop dashboard.
Export Your Masterpiece
You’ve done it! You successfully edited a photo in Lightroom and now you’re ready to save!
In order to do so, simply right click on the photo until various options appear. Then choose “Export” and “Export” again. At this point, Lightroom will prompt you to name your file and say where you’d like it saved.
And voilà! Your first Lightroom experience is complete! Once you’re done, you can close out of your Lightroom Catalog and store it on an external drive or directly on your computer to quickly use for the next time.
How did it go? Easy peasy? As you experiment more and more, you’ll become increasingly proficient with editing photos in Lightroom. Soon, it will feel like second nature and you’ll develop a style all your own.
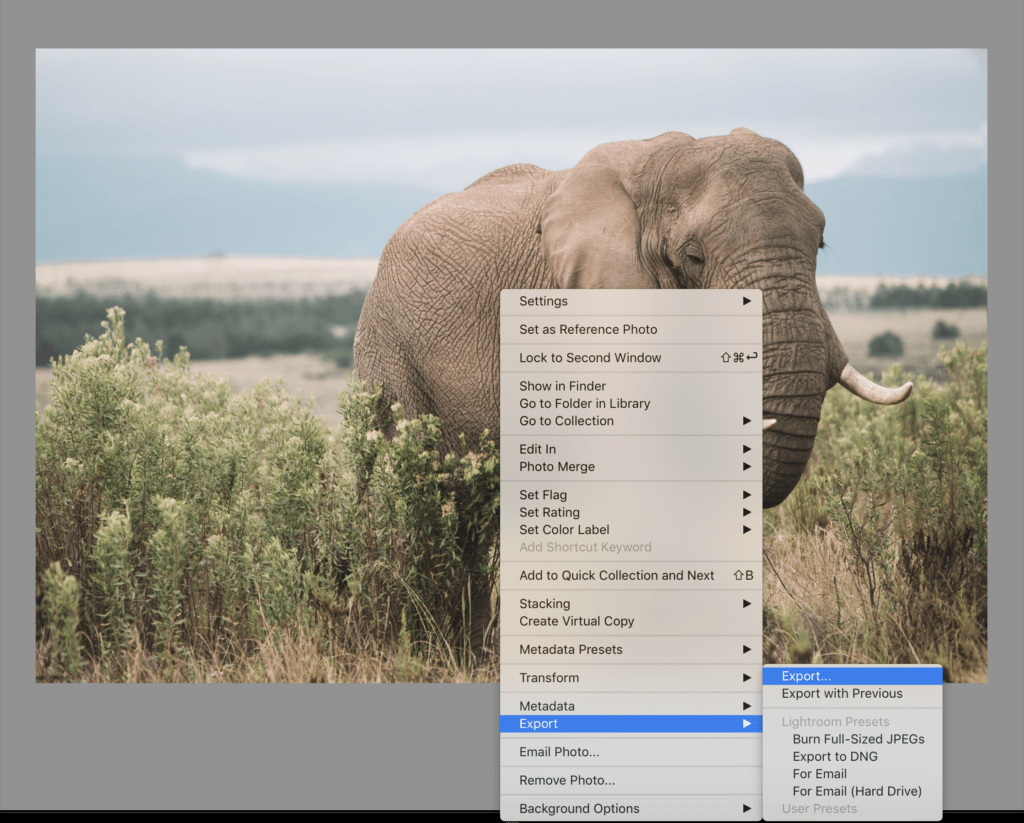
How to export your photos.
And there you have it! All the basics for how to start editing photos in Lightroom to create images as incredible as the subjects you shoot. Or, if you simply don’t have the time and want some else’s help editing photos, you can hire it out! Either way, your images are going to look incredible!
So grab your subscription to the Adobe Creative Cloud Photography Plan and enjoy Lightroom’s endless tools (along with other amazing products like Photoshop, Spark Premium, and Portfolio, which are also included in the plan). Together, these photo programs will allow you to create professional-looking images in no time!
Happy editing!

You May Also Like:
» 10 Tips for Incredible Photography Composition
» How To Use Your DSLR Camera
» The Ultimate Travel Photography Gift Guide


great site. Information very easy to follow.
Thanks so much for saying so! I hope it’s been useful!