


Remember playing with sparklers as a kid? The excitement of the first couple sparks and the joy of writing your name as they slowly burned to ash? Well, you can experience the same thrill as an adult by creating amazing sparkler photos!
Get. Excited.
But, in order to do so, there are a few things to keep in mind. Here are some tips on how to photograph sparklers that will help you create some truly awesome images.
Location
The first thing you need to consider when photographing sparklers is the location you’ll shoot in. To create a clear image, it’s important to find a place with as little ambient light as possible. That’s because ambient light creates blur (and blur, in most cases, isn’t your friend).
Similar to blur is ghosting. Ghosting happens when light reflects off the surface of your lens repeatedly, and can quickly ruin a great shot. If you notice unintentional ghosting in your photos, try holding the sparkler farther away from your body to fix it.

Setup
Having the correct setup is as important as your choice of location. First and foremost, you need a tripod. This becomes especially important when trying to create words or drawings with sparklers because longer shutter speeds require complete stillness.
Personally, I use the Davis & Sanford Compact Tripod and I absolutely love it! It’s lightweight, versatile, and sturdy (plus, it easily fits in my carry-on. Bonus!)
Once you have a tripod, you need to shoot with a remote shutter to avoid any shake. Fortunately, my Canon 5D Mark IV

Focusing
When shooting in dark conditions, it can be hard for your camera to know where to focus. To alleviate this problem, while in autofocus light up your subject with a flashlight (or, have your subject hold up their phone’s light so your camera knows where to focus). Then, once your camera is focused correctly, switch to manual focus and don’t touch the focus again.
If you want to get creative, try focusing on the sparklers instead of people and vice versa. It will create nice bokeh that adds interest to your frame. And, if you want to get really fancy, you can have your subjects backlit with a remote flash in the background and write a message in front of them with sparklers for a cool composition.
But, more on drawing and writing in a minute…

Camera Settings
When it comes to camera settings, the one you’ll play around with the most is shutter speed. And, how long you want your shutter open depends on the type of shot you’re trying to get. If you want to freeze a sparkler in place, then a faster shutter speed of around 2-5 seconds is best. However, if you want to show the movement of a sparkler (such as when you write or draw), then you’ll need a shutter speed of anywhere between 15-30 seconds, depending on the design you’re creating.
Set your ISO around 100 to keep your image from being too grainy. If that’s too dark, you can go as high as an ISO of 400 to lighten your image without it getting too noisy.
And finally, start with an aperture of about f/5.6 and adjust up or down from there. If you want the sparkler to have finer lines, then raise your f stop. If you want to create broader sparkler lines, then lower your f stop.
Confused? Then click here for my post on understanding shutter speed, ISO, and aperture.
Writing & Drawing
Now, for the real fun – writing and drawing with sparklers!
There’s more to creating really awesome images than simply keeping your shutter open longer. There’s movement, perspective, and style.
First, let’s talk about movement. Because your shutter will be open longer, that means any movement at all will appear blurry. This can be good and bad. You want your subject to be clear, so it’s important for them to stay completely still. Obviously, that’s hard to do if they’re the one writing. But, if that’s the case, just ask them to be completely still outside of moving their arm.
Movement blur can also work in your favor! While your subject holds completely still (I’m talking frozen-like-a-statue still!) have someone else run around them either writing or drawing. The key here is the person with the sparkler not holding still even for a second! Because, if they’re moving the camera won’t be able to pick them up, and you’ll be left with an image that makes it appear as if your subject is playing with fire. (But in a good way, not a Smoky the Bear infomercial way).
Whatever you’re writing, don’t stop! If you get done with your writing or drawing and simply stand there until the shutter releases, you’ll end up with what appears to be a giant ball of fire.
Next, remember your camera’s perspective. If you’re in front of the camera writing a word, you need to write backward starting from the right. This is because your camera is seeing a mirror image, so if you write as you normally would, from the left, your photo will appear backward.
And, finally, unless you have multiple people writing out a word (where each person is in charge of a single letter), writing in cursive works best.


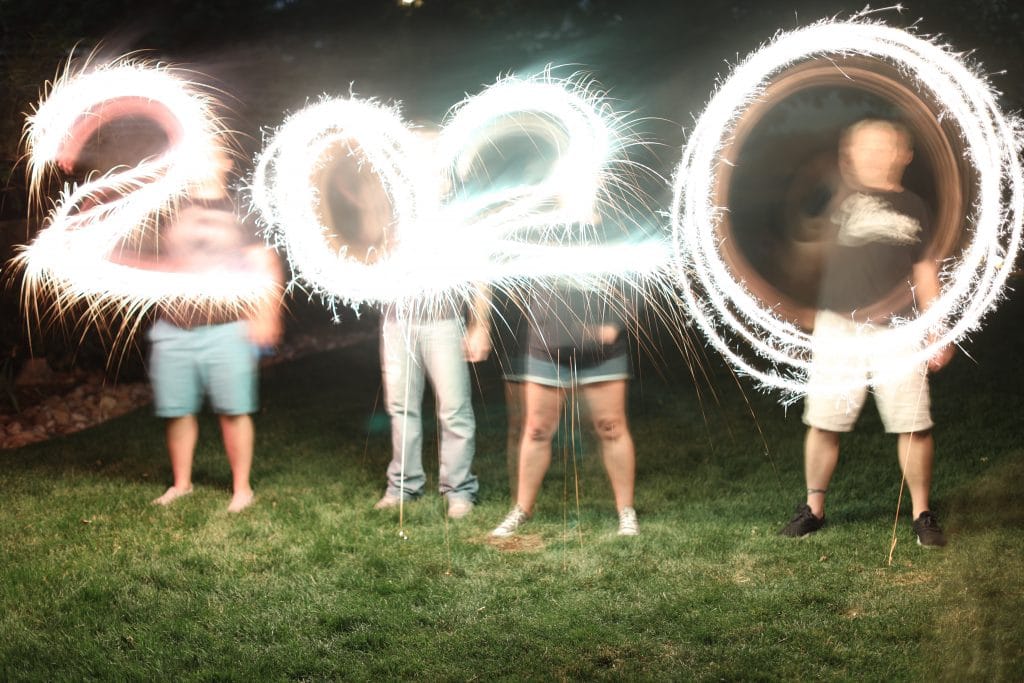
And, there you have it! Easy tips on how to photograph sparklers that will jazz up your next get together or Fourth of July celebration. And with them, your fantastically festive photos will soon become the envy of all your friends.
Have you tried any of this before? Comment below, I’d love to hear how your images turned out!
You May Also Like:
» How To Photograph Fireworks
» Simple Basics of Using a DSLR Camera
» Lightroom Tips & Tricks That Will Blow Your Mind


Leave a Reply