


Trying to create the desired look and feel for your photos can take hours. And moving each Lightroom slider in just the right combination can sometimes feel as daunting as trying to crack a safe.
There has to be a better way! (said in a cheesy infomercial voice)
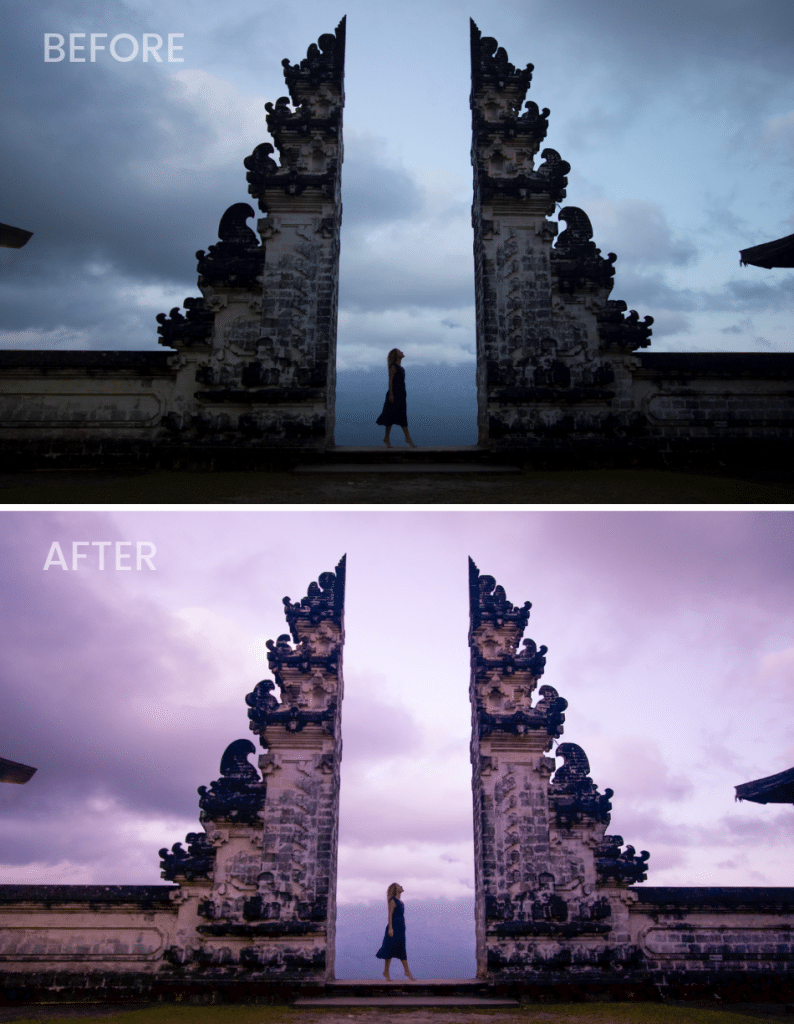
Well, there is! And it’s with an easy-to-use tool called a preset. And, by the end of this article, you’ll know exactly how to use a Lightroom preset to improve your own photos.
What Is A Preset?
A preset is a specific combination of slider settings saved within an editing program, such as Lightroom. The settings tend to look best on similar photos and can save you tons of time when post-processing your images.
Lightroom has its own presets, which are located on the left side of your Develop panel. In addition, you can create your own or import others you purchase online.
I’m a big fan of presets and tend to hoard them the way an old lady might hoard cat figurines. They transform a photo with the simple click of a button and make editing incredibly fun (and easy!)

How To Use A Lightroom Preset
Using a preset couldn’t be easier (which is why they’ll forever change your life). When you have an image ready to edit in the Develop panel, all you have to do is the following:
- Click on the preset
Boom! That’s it.
Tips For Using A Lightroom Preset
While presets are a great jumping-off point, they typically won’t be where you stop in your editing process. That’s because photos will vary depending on lighting, color, style, etc. So while presets can provide the vast majority of your edits, additional tweaks are often necessary.
I suggest the following once a preset has been applied:
EXPOSURE
Start with your Exposure slider. A quick change up or down can achieve the look you’re going for.
SHADOWS & HIGHLIGHTS
Next, adjust Shadows to lift dark areas and Highlights to modify bright areas where detail is being lost.
COLORS
Finally, you can adjust the colors and hues of your image with the Temperature and Tint sliders, as well as the individual color controls in the HSL/Color/B&W panel.
CROPPING
And of course, if you need to crop your photo or straighten the horizon, head to your Cropping tools to do so.
Often, making these minor adjustments will get you to that picture-perfect final image.
Creating A Preset
Creating a preset is just about as easy as using one, and you can do so in five quick steps:
- Use Lightroom’s Develop panel to make your desired edits
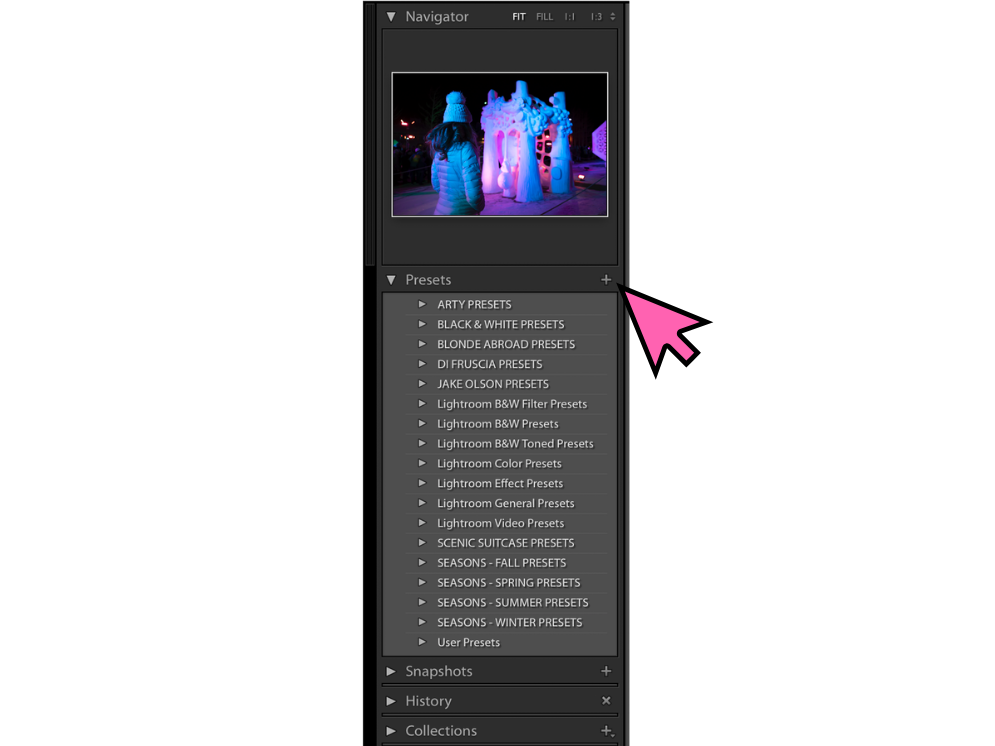
- Click the + button to the right of the Presets section
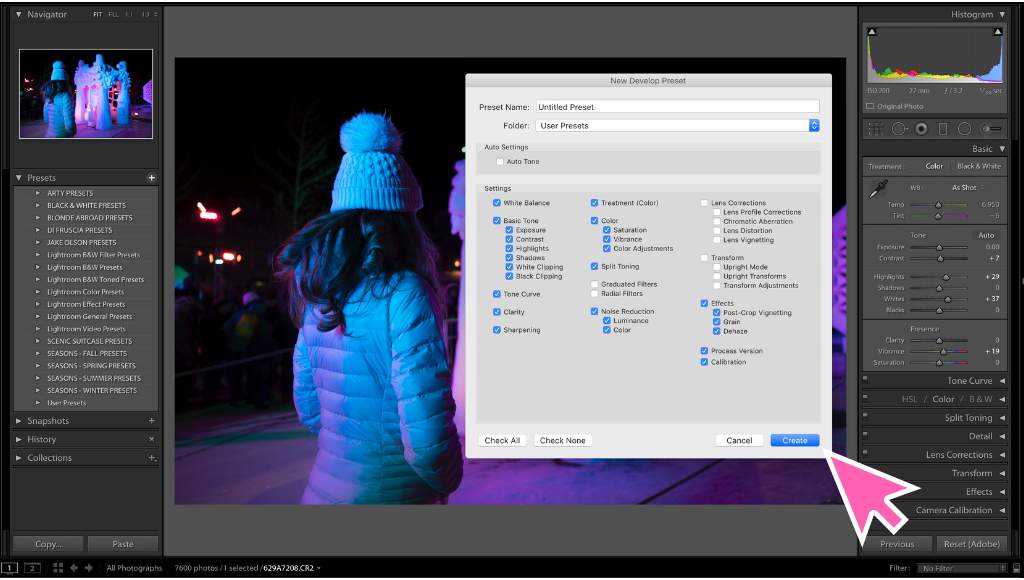
- Name your preset and choose what folder it should be saved to
- Specify what edits you want to be applied from the checkboxes
- Click Create
When it comes to what edits to save, I recommend never saving ones related to the Lens Correction, Transform, or Gradient sections. Those are photo-specific, so copying them to use on other images won’t work well.
Expert Tip:
Before saving your preset, try the edits you’ve made on similar photos to see if they work well. To do so, simply right click on the image and go to Settings, and then Copy Settings. After, go to a similar photo and right click, then go to Settings and Paste Settings to apply. Easy peasy!

Importing New Presets
Another way to add presets to your arsenal of editing tools is to purchase them online. Many photographers will sell a collection of their presets, making it that much easier to achieve the look you’re going for in your own photos.
In addition to having my own preset collection for sale, I’ve also purchased ones from photographers I admire like The Blonde Abroad and Patrick DiFruscia (who has 40 trees planted for every preset sold!)
After purchasing a collection, you can import them to Lightroom in just a few simple steps:
- Open the zip file containing the new presets (each preset will end in .lrtemplate)
- Open Lightroom
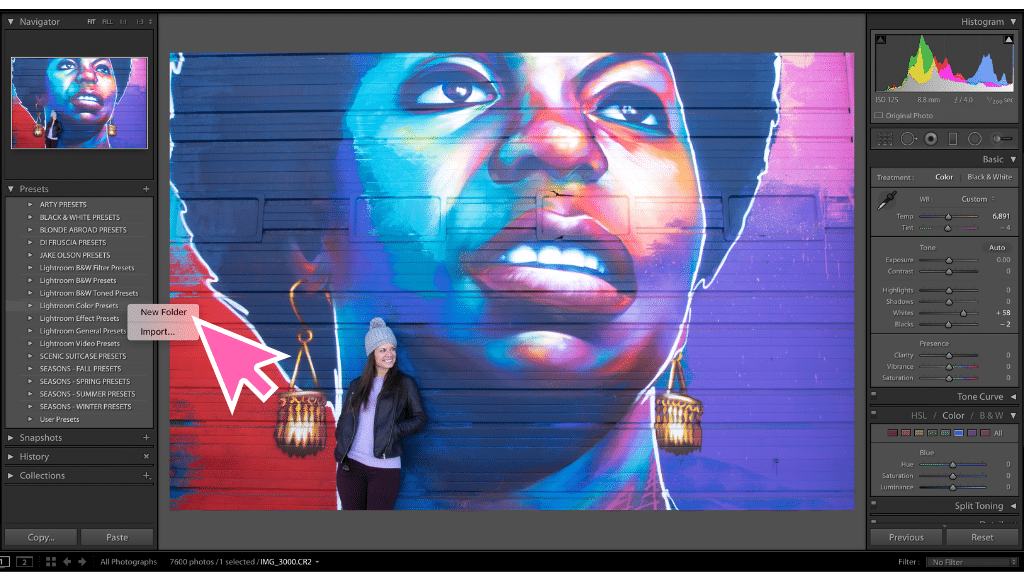
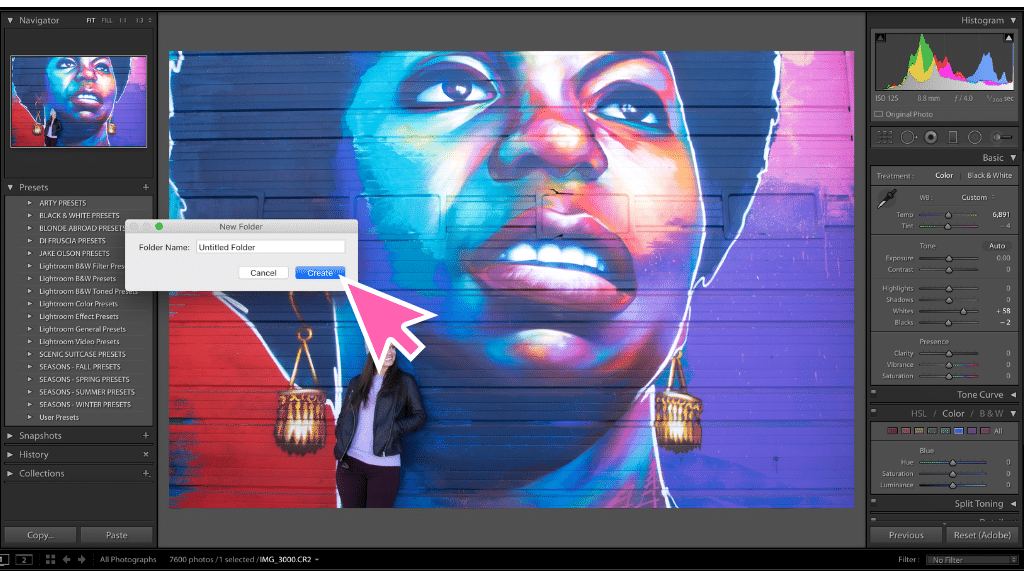
- Go to the Develop panel, right click on the Presets section, and choose New Folder
- Name your folder after the preset collection you’re adding
- Right click on the new folder and choose Import
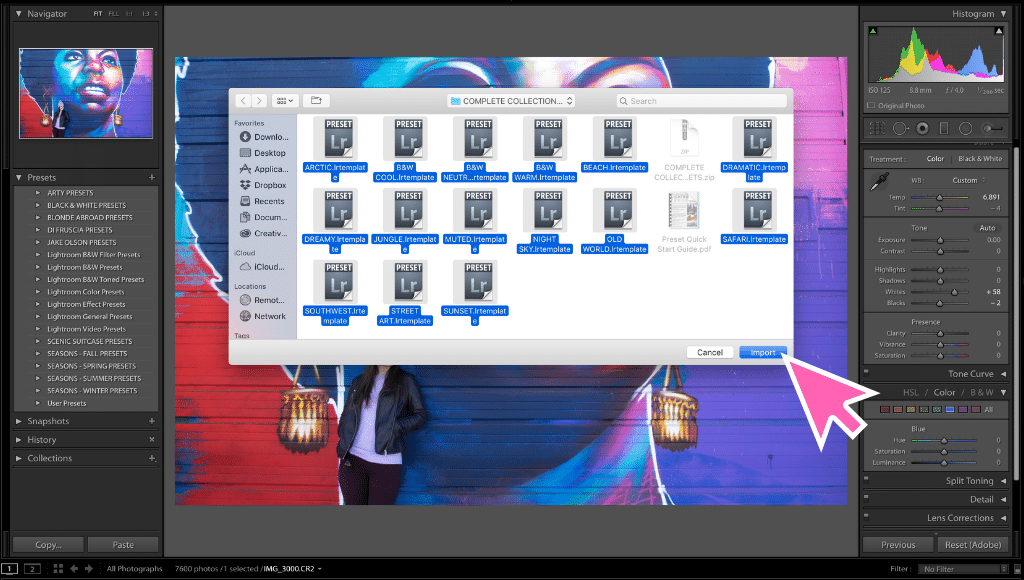
- Select all your new presets from the open zip folder
- Click Import
And just like that, you’re ready to create dazzling images with your fancy new presets!
(insert squeal of excitement)

Exporting Presets
Have a bunch of awesome Lightroom presets you created? Sell them! It’s a great way to make a little extra money while helping fellow photographers add more tools to their own editing.
To do so, you just need to export your presets in three easy steps:
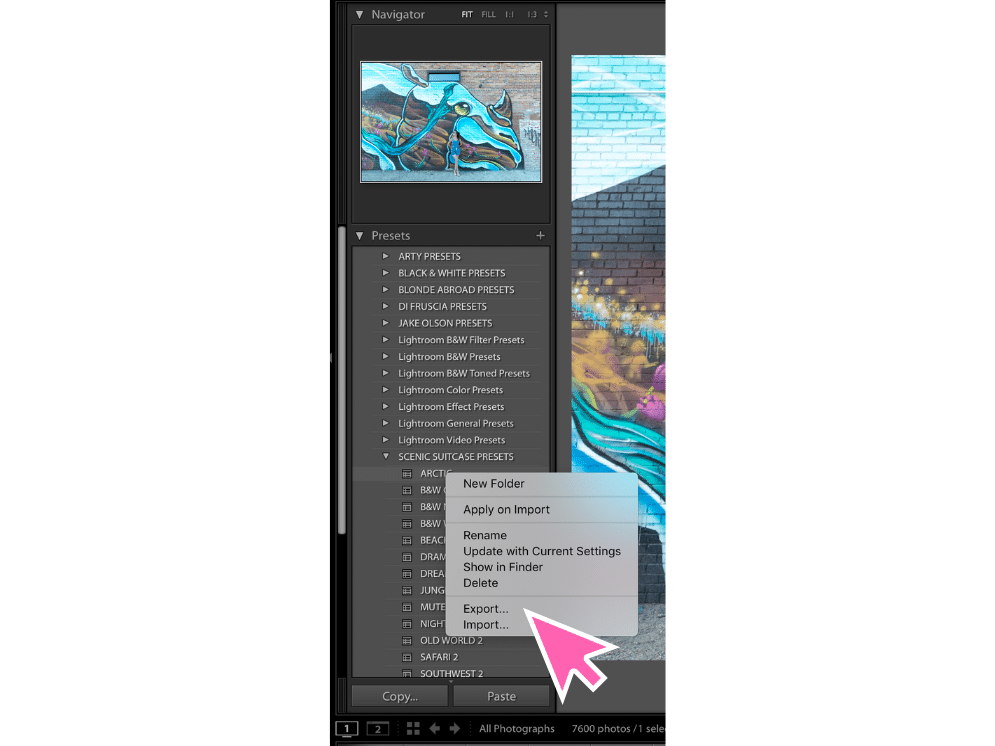
- From your Presets area, right click on a preset and choose Export
- Name your preset and choose where you want it saved
- Click Export
Each preset will be saved as a template ending in .lrtemplate (making them easy to identify).
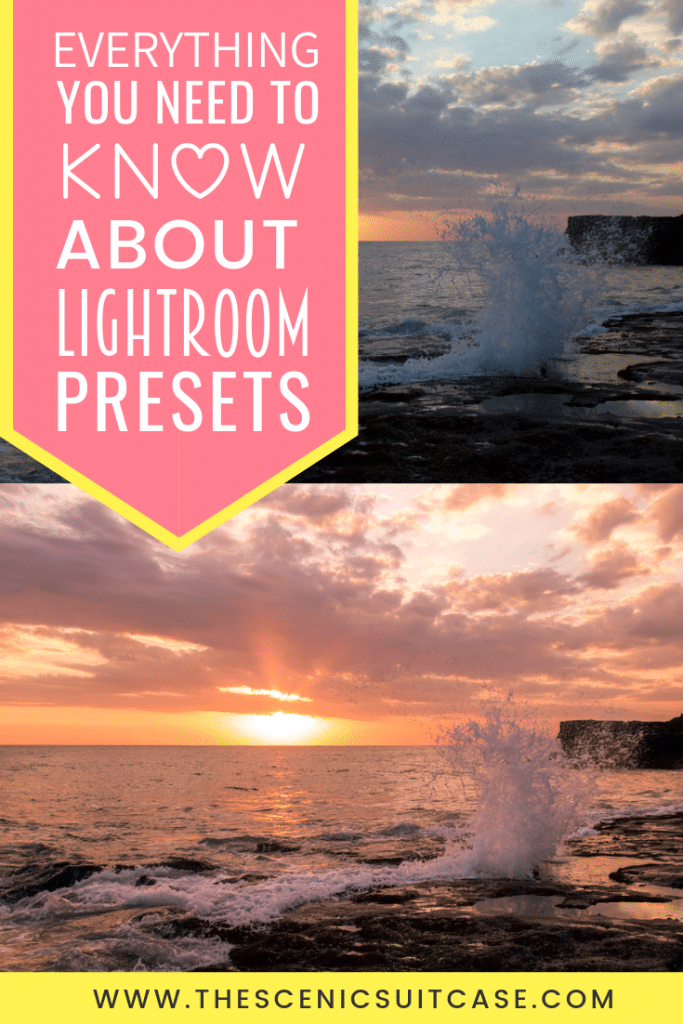
To sell them, create a zip file for the folder they’re saved in. Then, whip up a few before and afters, as well as some marketing graphics, and sell them through sites like Woo Commerce or Etsy.
Now just sit back, relax, and enjoy the passive income!

And there you have it! Everything you need to know about how to use a Lightroom preset to create stunning photographs in post-processing.
Do you have a collection of presets you love? Share them in your comments below, I’d love to hear what they are!
You May Also Like:
» A Beginner’s Guide To Editing In Lightroom
» Lightroom Shortcuts and Tricks
» Common Photo Editing Mistakes

Leave a Reply